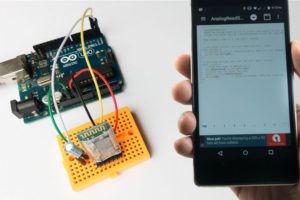
This means that you only need to connect Arduino board to your PC or Laptop only once for first time programming and configuration and then use your Android Phone to write code, compile and then upload sketches to your Arduino directly via Bluetooth.
Success Story
The maker sure has a very successful story of making and designing. The concept is all built around the powerful Android application that does it all.The maker is so smart as he took the hardware open source approach with his concept. He has even designed his own Arduino Shield that made the same function and compatible with his application.
The maker offers the application for free on Google Play Store with the availability to buy the Pro version of the app.
Materials

Hardware :
- Arduino Uno
- Bluetooth HC-05 module
- Mini breadboard
- Capacitor 1uf/16v
- Reasisor 100 ohm
- 5 pcs x Jumper wires
- USB cable
- Android device with Android 4.0.0+ (Bluetooth available)
- Laptop/PC
- Bluino Loader from the Google Play store
Steps
Program using PC or Laptop
void setup() {
  Serial.begin(38400);
  delay(500);
  Serial.println("AT+NAME=Bluino#00");
  delay(500);
  Serial.println("AT+UART=115200,0,0"); // Use this baudrate if using for Arduino Uno, Bluino and Mega2560
//Serial.println("AT+UART=57600,0,0");  // Use this baudrate if using for Arduino Nano, Leonardo, Micro, Pro Mini 3V3/5V and Duemilanove
  delay(500);
  Serial.println("AT+POLAR=1,0")
  delay(500);
}

void loop() {
}
This step comes first to configure Arduino and Bluetooth module for the process.
You need to upload the code to Arduino.
This code contains several functions to change the parameters of Bluetooth HC-05 :
- AT+NAME=Bluino#00 : Change name of bluetooth module, default name is "HC-05".
- AT+BAUD=115200,0,0 : Change baud rate to 115200 (Arduino Uno, Bluino and Mega2560)
- AT+BAUD=57600,0,0 : Change baud rate to 57600 (Arduino Nano, Leonardo, Micro, Pro Mini 3V3/5V and Duemilanove)
- AT+POLAR=1,0 : Change state pin conditio
- For additional you can change password to use not standard password while pairing, AT+PSWD=xxxx.
Name of bluetooth must "Bluino#00-9999", if you want custom name you should use the paid version of Bluino Loader App.
Connection

Note the capacitor and resistor connected between Arduino and Bluetooth. Those components are important for resetting Arduino after sketch upload finishes.

Setup Bluetooth HC-05
This is the step where you will run the code you uploaded to Arduino while the Bluetooth module is connected to Arduino.
Press and hold KEY button
• Plug USB cable for powering Arduino
• Wait about 5 second (still hold KEY button)
• Unplug and re plug USB for reset from AT command mode
Install and run the application
The application looks like Arduino IDE
Here you can write, compile and then upload sketches to your Arduino project without having troubles connecting it to PC or Laptop.
Of course the first program that comes in mind when trying this method is the Blink example.
- After installing the app you can open example sketch BluinoLoader/examples/02.Basic/Blink/Blink.ino
- Tap on "upload" button (Arrow in the circle icon)
- After done compiling no error, tap button "Scan Bluino Hardware" to search active bluetooth
- Pick bluetooth hardware with name "Bluino#00"
- Enter pairing code standard "1234", then OK
- Wait until process uploading done
Congratulations .. You have made your Bluetooth Programmable Ready Arduino project.
Now you can write any code and then compile it and then upload it all using your smart Android.
Thanks mansurkamsur. Keep going.
Source: instructables
No comments:
Post a Comment